Sunday, May 30, 2010

Chocolate for Breakfast - Who Can Argue With That?

My friend Dorie Greenspan (I call her my friend now, even though it's only a dream of mine to meet her) makes delicious banana bread. She also happens to be the author of the best baking book I own, and that's saying a lot, considering how many I own.

This is mostly a chocolate loaf with a bit of banana goodness in it. See, this is why Dorie and I are "friends". She's always trying to find new ways to have chocolate for breakfast. I think this is my most favourite way that she's come up with - this loaf is dense, moist, and seriously delicious.


So, when life gives you these:


You make Dorie's cocoa-nana bread (recipe from 'Baking', by Dorie Greenspan):


2 Cups All-Purpose Flour
1 Cup Unsweetened Cocoa Powder
1 1/2 tsp Baking Powder
1/2 tsp Salt
1/4 tsp Baking Soda
1/2 Cup Butter, at room temperature
3/4 Cup Sugar
1/2 Cup Brown Sugar (packed)
2 Large Eggs
2 Ripe Bananas, mashed
3/4 Cup Buttermilk
1/2 Cup Chocolate Chips

Centre a rack in the oven and preheat the oven to 350F. Butter a 9x5 inch loaf pan and place it on an insulated baking sheet, or on two regular baking sheets stacked up on top of each other, to ensure the loaf doesn't overbake.

Sift together the flour, cocoa, baking powder, salt, and baking soda.

Working with a stand mixer fitted with a paddle attachment, or a hand mixer in a large bowl, beat the butter at medium speed for about a minute, until softened. Add the sugars and beat for two minutes more. Add the eggs, one at a time, beating for a minute after each addition. At this point, the batter may look a little curdled - it's OK. Reduce the mixer speed to low and mix in the mashed bananas. Add the dry ingredients, in 3 additions, mixing only until they disappear into the batter. Still on low speed, add the buttermilk, mixing until it is incorporated. Stir in the chopped chocolate. Scrap the batter into the pan.

Bake for 30 minutes. Cover the bread loosely with a foil tent to keep the top from getting too dark, and continue to bake for another 40-45 minutes, or until a knife inserted into the centre comes out clean. Transfer the pan to a rack and cool for at least 20 minutes before running a knife around the edge of the pan and unmolding it. Invert the loaf onto a cooling rack and continue cooling to room temperature right side up.

Thursday, April 22, 2010

Sometimes You Just Have to Be a Little Self-Indulgent


For the first five minutes after taking a bite of one of these cupcakes, we couldn't speak. Partly because they were so delicious, and partly because they are such a dense chocolate cupcake. I recommend a glass of milk with one of these, or a litre of milk with six of them.


Chocolate-Chocolate Cupcakes (Makes 12 Cupcakes)

1 Cup All-Purpose Flour
1/4 Cup Unsweetened Cocoa
1/4 Tsp Baking Powder
1/4 Tsp Baking Soda
1/4 Tsp Salt
1/2 Cup Unsalted Butter, at room temperature
3/4 Cup Sugar
1 Lg Egg
1 Lg Egg Yolk
1/2 Tsp Vanilla Extract
1/2 Cup Buttermilk
2 oz Bittersweet Chocolate, melted and cooled


Chocolate Glaze

3 oz Bittersweet Chocolate, coarsely chopped
1 Tbsp Confectioners' Sugar, sifted
2 Tbsp Cold Unsalted Butter, cut into 6 pieces


Center a rock in the middle of the oven. Preheat the oven to 350F. Line a 12-cup muffin tin with paper liners.

Whisk together the flour, cocoa, baking powder, baking soda, and salt. Set aside.

Working with a stand mixer fitted with the paddle attachment, or with a hand mixer, beat the butter at medium speed until soft and creamy. Add the sugar and beat for about 2 minutes, until it is blended into the butter. Add the egg, then the yolk, beating for 1 minute after each addition and scraping down the bowl as needed. Beat in the vanilla, then reduce the mixer speed to low and add half of the dry ingredients, mixing only until they disappear. Scrape down the bowl and add the buttermilk, mixing until incorporated, then mix in the remaining dry ingredients. Scrape down the bowl, add the melted chocolate, and mix it in with the rubber spatula. Divide the batter evenly among the muffin molds.

Bake for 22 to 25 minutes, until a knife inserted in the center of a cupcake comes out clean. Transfer the muffin tin to a cooling rack for 5 minutes before unmolding them. Allow them to cool to room temperature.

To make the glaze: Melt the chocolate in a double boiler. Transfer the bowl with the melted chocolate to the counter and let it sit for 5 minutes.

Using a whisk or rubber spatula, stir the confectioners' sugar into the chocolate, followed by the pieces of cold butter. When the glaze is an icing consistency (it may take a few minutes to cool down to the right temperature). You may also be able to dip the cupcakes into the glaze to ice them.

Tuesday, April 6, 2010

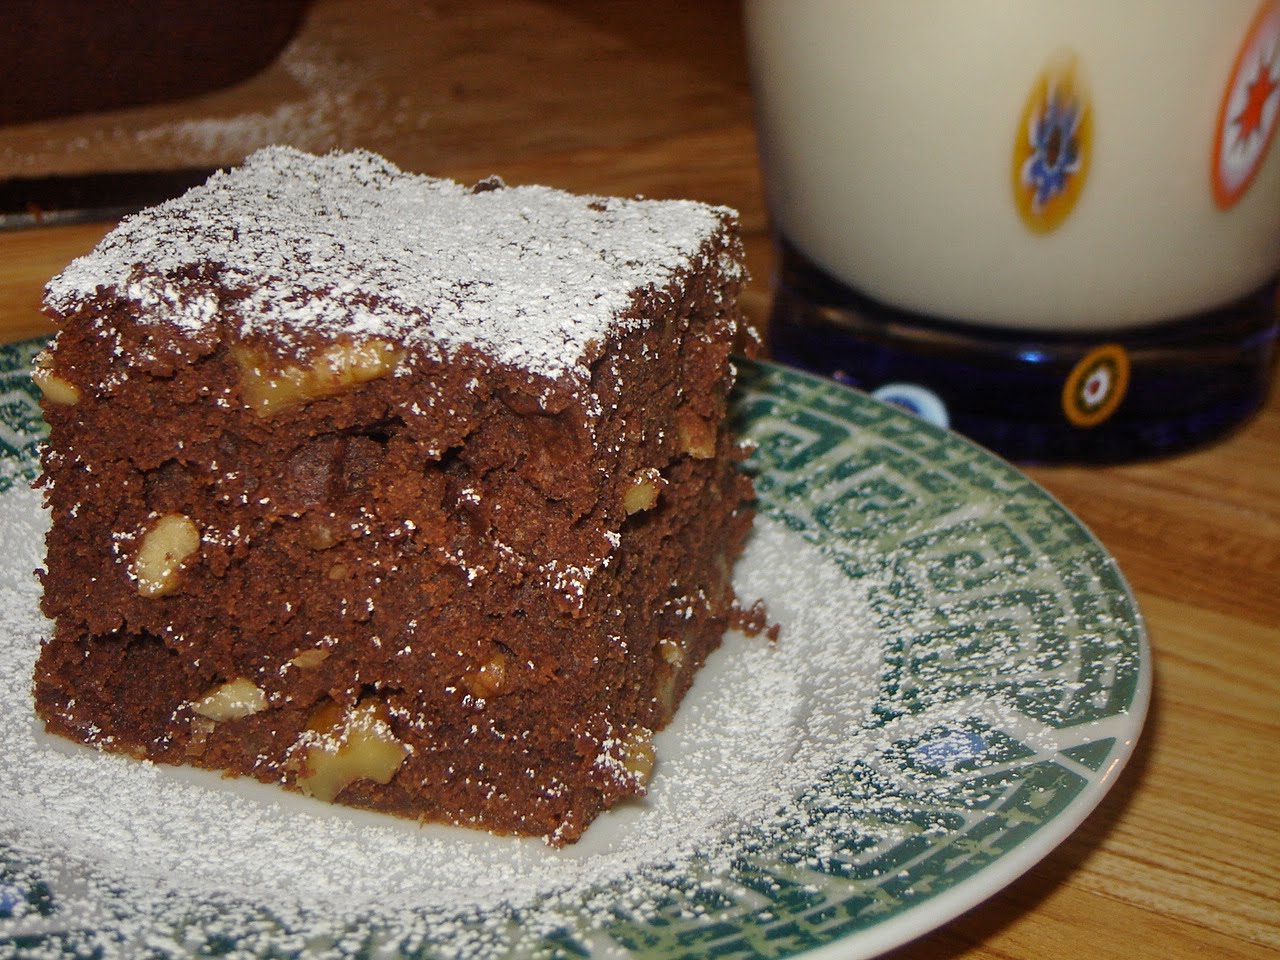
Brownies: Turning Frownies Upside-Downies Since Well... Now


Who Says Blondies Have More Fun? These brownies are a fantastic time. They'll make your life better, trust me.

The honey taste is absolutely wonderful. Resist omitting the nuts.


Honey Nut Brownies

1/2 Cup Butter
4 oz (4 squares) Bittersweet Chocolate, coarsely chopped
4 Lg Eggs
1/2 Tsp Salt
1 Cup Honey
2/3 Cup Sugar
1 Tsp Vanilla Extract
1 Cup All-Purpose Flour
1 Cup Chopped Nuts (I used walnuts)

Center a rack in the oven and preheat it to 325F. Line a 9" square baking pan with foil and coat the foil with butter to prevent the brownies from sticking. Set aside.

Melt butter and chocolate in a double boiler just until everything has melted and consistency is smooth. Remove from heat and allow to cool slightly.

Using a stand mixer fitted with the paddle attachment, or an electric mixer and a large bowl, beat eggs and salt on medium-high speed until foamy. Add the honey, sugar, and vanilla and mix on low speed for 2 minutes. Add the chocalate and butter mixture and mix only until incorporated. Add the flour and mix on low speed just until it disappears into the batter. Fold in the nuts. Spread the batter in the pan.

Bake the brownies for 45-50 minutes, until the brownies have risen and a toothpick inserted in the center comes out clean. Transfer the pan to a rack and allow to cool for about 5 minutes.

Invert the pan onto a cooling rack and remove the foil. Turn the brownies over to allow them to continue cooling right side up.

Cut the brownies into 16 squares. Dust the brownies with confectioners sugar before serving, if desired.

Thursday, April 1, 2010

Veggies for Breakfast


Your house will smell absolutely divine while a batch of these are baking in the oven. They are a perfect accompaniment to your morning coffee, full of fruit and nut goodness to get the day started off right.


Pumpkin Muffins

2 Cups All-Purpose Flour (I used nutri flour)
2 tsp Baking Powder
1/4 tsp Baking Soda
1/4 tsp Salt
3/4 tsp Cinnamon
1/2 tsp Ground Ginger
1/8 tsp Nutmeg
1/2 Cup butter, at room temperature
1/2 Cup Sugar
1/4 Cup Light Brown Sugar (packed)
2 Lg Eggs
1/2 tsp Vanilla
3/4 Cup Canned Pure Pumpkin
1/4 Cup Buttermilk
1/2 Cup Golden Raisins (I used currants)
1/2 Cup Walnuts, chopped

Center a rack in the oven and preheat the oven to 400F. Butter or spray a 12 cup muffin pan. Place the muffin pan on a baking sheet.

Whisk together the flour, baking powder, baking soda, salt, and spices.

Working with a stand mixer fitted with the paddle attachment, or a hand mixer and a large bowl, beat the butter at medium speed until soft. Add both sugars and continue to beat until light and smooth. One by one, add the eggs, beating well after each addition, then beat in the vanilla. Lower the mixer speed and mix in the pumpkin and buttermilk. With the mixer at low speed, add the dry ingredients in a steady stream, mixing only until they disappear. Stir in the raisins and nuts. Divide the batter evenly among the muffin cups and sprinkle a few sunflower seeds over the top of the muffins, if desired.

Bake for about 25 minutes, or until a toothpick inserted in the center of a muffin comes out clean. Transfer the pan to a rack and cool the muffins for 5 minutes in the pan, then carefully remove each one from its mold and finish cooling on the rack.

Wednesday, March 31, 2010

Mmmmadeleines


I'm not going to try to describe these little cookies ~ they are beyond description. I won't try to tell you that they are the best cookie for dunking in a cup of tea that I've ever had. Nor will I mention that they absolutely melt in your mouth. I shan't mention that they are light, lemony, and luxurious, while being silky, sweet, and simple.

They're perfect.

Be sure to dust them with confectioner's sugar ~ for the full effect.


Traditional Madeleines

2/3 Cup All-Purpose Flour
3/4 Tsp Baking Powder
Pinch of Salt
1/2 Cup Sugar
Grated Zest of 1 Lemon
2 Lg Eggs, at room temperature
2 Tsp Vanilla
3/4 Stick (6 Tbsp) Butter, melted and cooled
Confectioner's Sugar, for dusting

Whisk together the flour, baking powder, and salt.

Working in a mixer bowl, or in a large bowl, rub the sugar and lemon zest together with your fingertips until the sugar is moist and fragrant. Add the eggs to the bowl. Working with the whisk attachment, or with a hand mixer, beat the eggs and sugar together on medium-high speed until pale, thick and light, 2 to 3 minutes. Beat in the vanilla. With a rubber spatula, very gently fold in the dry ingredients, followed by the melted butter. Press a piece of plastic wrap against the surface of the batter and refrigerate it for at least 3 hours, or for up to 2 days. This long chill period will help the batter form the hump that is characteristic of the madeleine.

Getting ready to bake: Center a rack in the oven and preheat the oven to 400F. Butter 12 full-size madeleine molds, dust the insides with flour and tap out the excess. Or, if you have a nonstick pan, give it a light coating of vegetable cooking spray. Place the pan on a baking sheet.

Spoon the batter into the molds, filling each one almost to the top. Don't worry about spreading the batter evenly, the oven's heat will take care of that. Bake the madeleines for 11 to 13 minutes, or until they are golden and the tops spring back when touched. Remove the pan from the oven and release the madeleines from the molds by rapping the edge of the pan against the counter. Gently pry any stubborn madeleines from the pan using your fingers or a butter knife. Transfer the cookies to a rack to cool to just warm or to room temperature.

Just before serving, dust the madeleines with confectioners' sugar.

Tuesday, March 30, 2010

A Weekend Trip to the Tropics


Wouldn't it be wonderful to head to the tropics for a whirlwind trip? What if I told you it was possible?

This pie is your means of escape to a warm tropical place. Cool, tart, and rich, this pie is a great way to take a weekend vacation.


Florida Pie

1 9-inch Graham Cracker Crust, fully baked and cooled
1 1/3 Cups Heavy Cream
1 1/2 Cups Sweetened Shredded Coconut, divided
4 Lg Eggs, separated
1 14-oz Can Sweetened Condensed Milk
1/2 Cup Fresh Key (or Regular) Lime Juice (from about 5 regular limes)
1/4 Cup Sugar

Center a rack in the oven and preheat it to 350F. Place the pie plate on a baking sheet.

Put the cream and 1 cup of the coconut in a small saucepan and bring it to a boil over medium-low heat, stirring almost constantly. Continue to cook and stir until the cream is reduced by half and the mixture is slightly thickened. Scrape the coconut cream into a bowl and set it aside while you prepare the lime filling.

Working with a mixer, beat the egg yolks on high speed until thick and pale. Reduce the mixer speed to low and beat in the condensed milk. Still on low, add half of the lime juice. When it is incorporated, add the remaining juice, again mixing until it is blended. Spread the coconut cream in the bottom of the graham crust, and pour over the lime filling.

Bake the pie for 12 minutes. Transfer the pie to a cooling rack and cool for 15 minutes, then freeze the pie for at least an hour.

To finish the pie: Preheat the broiler.

Put the 4 egg whites and the sugar in a medium saucepan and over medium-low heat, whisking constantly, until the whites are hot to the touch. Transfer the whites to a bowl (or the bowl of a stand mixer fitted with the whisk attachment), and beat the whites at high speed until they hold firm peaks. Using a rubber spatula, fold the remaining 1/2 cup coconut into the meringue.

Spread the meringue over the top of the pie, and run the pie under the broiler until the top of the meringue is golden brown. Return the pie to the freezer for another 30 minutes or for up to 3 hours before serving.

Sunday, March 21, 2010

I Love a Lazy Sconeday, Er... Sunday


I love breakfast on the weekend. Breakfast on the weekend is so much better, simply due to the fact that you can take a little more time to enjoy it. Weekend breakfast is doubly wonderful when you can take the time to bake something warm and comforting. As these scones are baking, you can smell toasted almonds through your entire house. These toasted almond scones dotted with butter and drizzled with a bit of organic honey are the perfect partner to a hot cup of black coffee or earl grey tea.


Toasted Almond Scones

1 Cup Blanched Almonds (whole, slivered, or sliced), toasted
1 Tbsp Sugar
1 Lg Egg
1/3 Cup Cold Heavy Cream
1/4 Cup Cold Whole Milk (I used 2%)
1/8 Tsp Pure Almond Extract
1 3/4 Cups All-Purpose Flour
1 Tbsp Baking Powder
1/4 Tsp Salt
1/2 Cup Cold Butter, cut into smaller pieces
1/4 Cup Sliced Almonds (optional)

Center a rack in the oven and preheat the oven to 400F. Line a baking sheet with parchment paper or a silicone mat.

Divide the toasted almonds in half. Finely grind 1/2 cup in a food processor or blender with the sugar until the mixture resembles a coarse flour. Finely chop the other 1/2 cup.

Stir the egg, cream, milk and almond extract together.

Whisk the flour, ground almonds and sugar, baking powder and salt together in a large bowl. Drop in the butter. Cut and rub the butter into the flour until the mixture resembles pebbles, or at least something close.

Pour the liquid ingredients over the dry ingredients and stir with a fork until the dough just starts coming together. Stir in the chopped almonds.

With the dough still in the bowl, fold the dough over itself 8 to 10 times. Turn the dough out onto a lightly floured surface and divide it in half. Shape each half into a 5 inch round. Cut each round into six equal pieces and top each piece with some sliced almonds, if you're using them. Place the scones on your baking sheet. (If you'd like to bake them later (although I'm not sure how you'll be able to wait), you can freeze them on the baking sheet, then put them in an airtight container. When you bake them from frozen, don't defrost them, just add 2 minutes to the baking time.)

Bake the scones for 20-22 minutes, or until their tops are golden. Transfer to a cooling rack and allow them to cool for the longest 10 minutes of your life before eating.